
Invoice line items are the individual rows on an invoice that break down exactly what a client is being charged for, listing each product, service, quantity, rate, and total separately. When your line items are clear and specific, clients approve invoices faster, disputes drop, and your business looks more professional. Vague or sloppy line items, on the other hand, are one of the most common reasons payments get delayed.
Content Table
What Are Invoice Line Items?
Each line item on an invoice represents one distinct thing you sold or did. Think of it as a single row in a table that answers four questions: what was it, how much of it, at what price, and what does that add up to?
A standard line item typically includes these fields:
- Description - what the product or service actually is
- Quantity - how many units, hours, or items
- Unit price / rate - the cost per unit or hour
- Line total - quantity multiplied by unit price
Some invoices also include a SKU (Stock Keeping Unit) or item code (useful for product businesses), a project or task reference, or applicable tax rates per line. The right fields depend on your industry, but the description is always the most important one.
Why Detailed Billing Matters
Detailed billing is not just about looking organized. It directly affects how quickly you get paid and how much your clients trust you.
Here is what happens when your line items are too vague:
- The client's accounts payable team cannot match your invoice to a purchase order or project scope, so it sits in a queue waiting for clarification.
- The client questions a charge they do not recognize, which triggers a back-and-forth email chain that delays payment by days or weeks.
- In a dispute, you have no written record of what was agreed, which makes it harder to defend your charges.
When your itemized invoice is specific, the client sees exactly what they agreed to pay for. There is nothing to question. Studies on small business cash flow consistently show that invoice clarity is one of the controllable factors that speeds up payment cycles. A well-written line item is essentially a mini-contract that both sides already agreed to.
How to Write Good Product Descriptions
Product descriptions on an invoice are different from marketing copy. You are not trying to sell the product again. You are confirming what was delivered so the client can match it to what they ordered.
A good product line item description includes:
- The product name (the exact name the client knows, not an internal code)
- A brief specification if there are variants (size, color, model number, version)
- The delivery period or date if it is a recurring or subscription product
Here is a before-and-after comparison:
| Vague Description | Clear Description |
|---|---|
| Product | Ergonomic Office Chair, Model ERG-200, Black |
| Software | Project Management Software License, 5 users, Jan 2025 |
| Supplies | A4 Copy Paper, 80gsm, 5 reams (500 sheets each) |
| Item | Custom Printed Tote Bag, 150 units, Navy Blue, Logo Front |
Notice that the clear versions answer the "which one?" and "how much?" questions without the client needing to ask. If your products have SKUs or catalog numbers, include them in parentheses after the name. That makes it trivial for a client's purchasing team to verify the charge against their own records.
How to Write Good Service Descriptions
Service descriptions are where most freelancers and service businesses go wrong. Services are invisible, so the description is the only evidence of what was delivered.
A strong service line item should include:
- The specific task or deliverable , not just a job category
- The time period or project phase it relates to
- The output or outcome where relevant (e.g., "resulting in X")
| Vague Description | Clear Description |
|---|---|
| Design work | Logo Design, 3 concepts + 2 revision rounds, delivered Jan 15 2025 |
| Consulting | Marketing Strategy Consulting, 4 x 1-hour sessions, January 2025 |
| Writing | Blog Post Copywriting, 3 articles (1,000 words each), Q1 Content Plan |
| Development | Website Bug Fixes, 6 hours, Checkout Flow + Mobile Navigation, Feb 2025 |
For hourly work, always show the number of hours and the hourly rate as separate fields so the client can verify the math themselves. For project-based billing, reference the deliverable name from your original proposal or contract. That one-to-one match between your proposal and your invoice removes almost all room for dispute.
If you are a freelancer who bills across multiple project types, the freelancer invoicing guide on this site walks through how to structure recurring and one-off charges on the same invoice without making it confusing.
Common Mistakes to Avoid
These are the line item errors that show up most often, and each one costs you time or money:
- Bundling multiple tasks into one line item. "Website work, 20 hours" tells the client nothing. Break it into tasks: design, development, testing. Each gets its own row.
- Using internal jargon or codes. Your internal project code "PRJ-447" means nothing to the client's finance department. Use plain language they recognize from your proposal.
- Omitting the time period. "Social Media Management" could be for any month. Always specify the period covered, especially for retainer-based services.
- Inconsistent naming across invoices. If you called it "Content Writing" last month and "Copywriting Services" this month, the client's accounting software may flag it as a new vendor. Pick a name and stick to it.
- Leaving the quantity field as 1 for everything. If you did 8 hours at $75/hour, show "8" in quantity and "$75" in unit price. Do not just put "$600" in the total with no breakdown.
- No reference to the original agreement. If a client approved a specific scope, quote number, or PO, reference it in the line item or in a note next to it.
Best Practices for Itemized Invoices
Beyond writing individual line items well, the overall structure of your itemized invoice matters too. Here are the habits that separate professional invoices from amateur ones:
- Group related line items. If you did design work and development work on the same project, group them under a sub-heading or section label. It makes the invoice easier to scan.
- Use consistent units. Pick "hours" or "hrs" and stick to it throughout. Mixing formats looks careless.
- Add a short note for unusual charges. If you billed for a rush fee or a third-party expense, add a one-line note explaining it. Surprises cause delays.
- Match your invoice to your quote. Use the same terminology, the same line item names, and the same quantities your client approved. Any deviation needs an explanation.
- Keep descriptions concise but complete. Aim for one to two lines per item. You do not need a paragraph, but you do need enough detail that the charge is self-explanatory.
- Show tax per line where required. In some jurisdictions, tax must be broken out at the line item level, not just as a total at the bottom. Check the invoice requirements that apply to your country or region.
Formatting also plays a role. A clean, readable layout makes your line items easier to process, even if the content is identical.
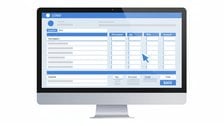
Finally, if you find yourself rewriting the same line items on every invoice, that is a strong signal to create saved templates or automate the process. Repeating the same manual entry every month introduces inconsistency and typos over time. Tools that let you save line item templates, like the invoice editor at BlueInvoice.net , make it easy to reuse polished descriptions without retyping them each time.
Build clear, professional invoice line items in minutes
BlueInvoice lets you create fully itemized invoices with detailed product and service descriptions, quantities, rates, and totals, all in a clean layout your clients can approve on the spot. No account needed to get started.
Create Your Free Invoice →
There is no fixed rule. Use as many line items as needed to clearly represent every distinct charge. A single-service invoice might have one or two rows. A project invoice covering design, development, and expenses might have eight or ten. The goal is that each charge is individually identifiable, not that the invoice is short. Grouping related items under sub-headings helps readability when you have many rows.
A regular invoice might show just a total amount due with a brief label like "Consulting Services, $2,000." An itemized invoice breaks that total into individual line items, each with its own description, quantity, rate, and subtotal. Itemized invoices are more transparent, easier to audit, and far less likely to be questioned or delayed. Most professional and B2B invoicing is itemized by default.
You can, but only if the tasks are genuinely the same type of work billed at the same rate. For example, "Blog Post Writing, 3 articles x $150 each" is fine as a single line item. Grouping completely different types of work (design, writing, and project management) into one row removes the transparency your client needs to approve the charge confidently, and it often causes payment delays.
It depends on your local rules. In many countries, tax can be shown as a single subtotal at the bottom of the invoice. However, some jurisdictions, particularly within the EU for VAT-registered businesses, require tax to be broken out per line item or at least shown clearly per tax rate. Check the invoicing requirements that apply to your country before deciding. When in doubt, showing tax per line is the safer and more transparent approach.
Reimbursable expenses should always appear as their own line items, never buried inside a service charge. Label them clearly, for example "Travel Expense, Client Site Visit Feb 3" or "Stock Photography License, Homepage Hero Image." If possible, attach receipts as a separate document or note that receipts are available on request. Transparency on expenses builds trust and prevents the client from assuming you are padding your fees.
Do not edit and resend the original invoice with the same invoice number. Instead, issue a credit note to cancel the original, then send a corrected invoice with a new invoice number. This keeps your records clean and gives both you and your client a clear paper trail. Notify the client by email explaining the correction before sending the new invoice so there is no confusion about which document to pay.